Coastal Riggings President Brendon Ziemba, along with his brother Preston, have been specializing in outrigger installation, repair and maintenance for 25 years. Before watching Brendon get into his work, I had no idea an outrigger could be broken down into so many different parts. Watching them disassemble, service and reassemble a pair of 3-spreader outriggers was an education. While my intent here is to offer some quality advice on keeping your outriggers tuned, I dont advise any of you to perform a full service yourself. There are too many intricacies and nuances to remember. Check out the video on our website, and I think you will agree. The best way to keep your outriggers tuned is easy. Call in the experts to perform a complete outrigger service, which includes a complete disassembly, every two years. Even if your outriggers appear to be in good shape and working well, servicing them is preventative maintenance to reduce corrosion before parts fuse together. If and when you do need a repair, youll end up saving time and money because you wont need to replace more sections or parts than are necessary, Brendon explains. Depending on the size of your outriggers you can budget anywhere from $700 to $1000 for service less parts. Plus, it so much easier to put a good polish and wax on your riggers while the cables are removed.
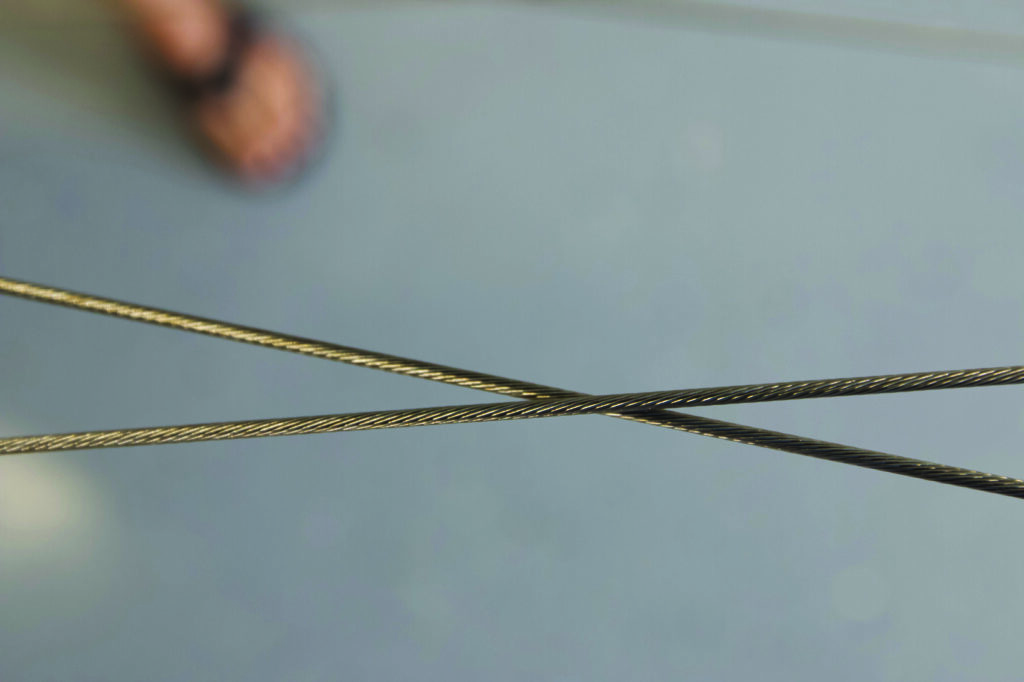
One of the most common outrigger issues are cables rubbing due to improper installation.
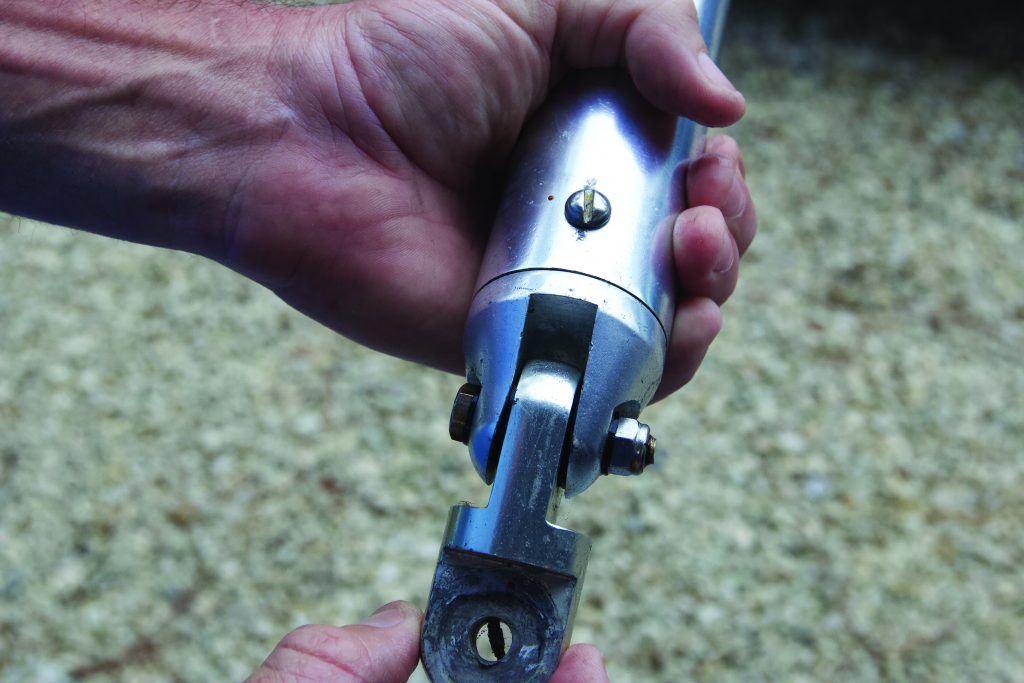
The Right Outrigger Cable Tension
Never should any of your rigger cables be touching. This, in fact, is one of the most common repairs Coastal Rigging observes. Each spreader is designed to off set the cables to prevent any contact. When cables do touch, eventually rust, corrosion and breakage occur. Again, call for service and learn how to fasten them correctly, and then youll be able to do minor tweaks to keep them tuned yourself. With lack of maintenance, you might also notice your cables becoming loose. More than likely your turnbuckles are backing off or spreader studs are not tight. If you do try to tighten your own cables, it is advisable to consult your outrigger manufacturer for the appropriate tension. Here, Brendon demonstrates factory recommended tension for the Rupp 3 spreader riggers: If you do need to tighten a cable, always adjust the nut on the turnbuckle and never tighten just the turnbuckle. This photo demonstrates the proper method”holding one wrench on the turnbuckle and another wrench on the nut. Again, tighten or loosen just the nut. A very common problem occurs when a captain or boat owner tightens the turnbuckle. As Brendon explains, you will twist the cable which will produce incorrect tension and cause damage to both rigger and cable. For the first spreader, tension on each cable should occur a half inch from the end of the aluminum part of the spreader bar (not plastic tip) before it is snapped into the spreader bar tip. On the second spreader (middle), tension on each cable should occur 1 to 1 ¼ inch from the end of the spreader bar before it is snapped into the spreader bar tip. Finally, the third spreader (top), tension on each cable should occur 2 to 2 ¼ inch from the end of the spreader bar before it is snapped into the spreader bar tip. As you can see from the images, cable tension increases as you progress up the outrigger.
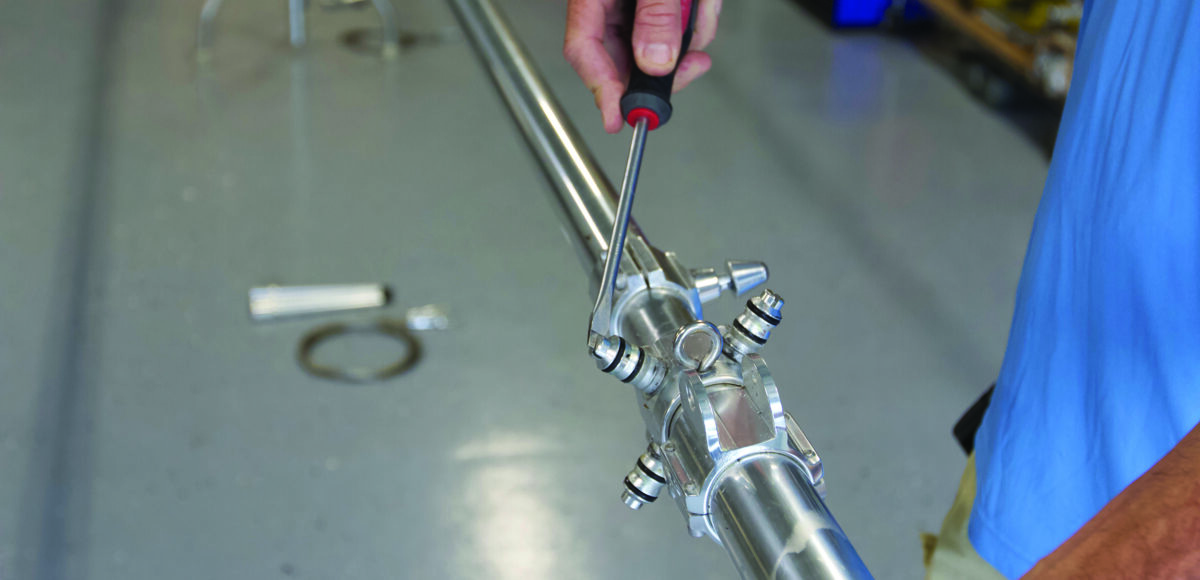
Loose Spreader Bar Fix
Another easy tune-up is tightening a spreader bar when you notice it starting to get a little slop or play. First, remove the cable from the spreader. Next, remove the spreader bar by pulling it straight off. Inspect the rubber bushings around the spreader studs and replace if needed. Then, take a flathead screwdriver and tighten (see photo on page 16). Replace spreader bar and cable.
An incorrectly installed toggle results in a bent base.
Tighten Outrigger Base Butts
If you have the slightest play in your outrigger base it time to inspect it. The base should be firm. A common issue occurs when the toggle is fastened incorrectly and creates a slight amount of play at the base. Over time, the slop increasingly starts to bend the base butt. However, this is generally a simple fix. Call your outrigger manufacturer and ask for the base butt hardware and toggle assembly.

Layout arm rubbing.
Stop Layout Arm Rub
Another common tune-up is preventing the layout arm from rubbing on either the cables or the spreader bar. Ninety-nine percent of the time this rubbing comes from operator error or incorrect installation of the layout arm. At the end of the layout arm on each end, jam knuts secure the knuckles. The knuckles attached to the boat are loose on purpose. “Most of the time these repairs are caused from a captain tightening down on the knuckle too much”after assuming they are beginning to loosen, says Brendon. This usually results in the layout arm rubbing and any captain who has been around boats has seen this. On the longer section of the layout arm, the knuckle connected to the outrigger is easily adjustable with the jam nut. Simply loosen, have someone hold the layout arm up and away from any cable or spreader bar and then tighten the jam nut accordingly. The video demonstration from Brendon linked above provides for a great explanation.
Oh Shit, The Bridge
Here a really good outrigger tip for anyone who has ever suddenly found themselves driving under a bridge with riggers banging, scraping and bending. After saying the obligatory, Oh shit!, what should you do? Take the advice of Coastal Rigging Brendon Ziemba who has been repairing outriggers for 25 years. Once your riggers touch something, keep going and dont back up! It only natural to immediately react by slamming the throttles in reverse, but generally, that the worst thing any captain or boat owner can do. Instead, proceed as slowly as possible and accept the embarrassment of making a mistake. Bent outrigger sections are fairly simple to replace. The costly damage can occur when the riggers are jammed up and the captain tries to reverse out of the accident. Then, the riggers really get bent out of shape and wherever they are mounted”including the boat paint, hard top and fiberglass”can be severely damaged.
Conclusion
Riggers can be a low priority maintenance item due to the high quality of the products manufactured today. The sticks poking high and wide from your boat are essential to fishing enjoyment. Keeping them tuned is the best way not to lose any valuable time on the water. My advice is to call in an expert for service, but educating yourself on how your riggers are assembled can go a long way when you are in a pinch and need to make a repair yourself. Thanks again to Brendon and Preston Ziemba from Coastal Rigging for taking the time to demonstrate and explain outrigger service in detail””right long.”